Wednesday 27 May 2020

Fix Outlook Server Connection Error With Ease

MS Outlook is a free personal email application available as a part of the Microsoft Office suite. It has distinct features including calendar, task manager, contact manager, note taking, journal and web browsing. It is the best emailing service for making communication from anywhere out of the globe via sending/receiving mail process. But if the server is down or experiencing an Outlook Server Connection Error, you won’t be applicable to perform any task like send or receive emails on Outlook account. Do you know this server connectivity problem can be resolved within a pinch? Yes, my friend! It will be easily eradicated but only when you read the blog posted here. This blog is accumulated with several methods that you can freely implement to deal with such a server connection problematic error issue. Therefore, despite wandering here and there keep your eyes feast over here for door-step guidance.
outlook server error

Required Procedures To Fix Outlook Server Connection Error With Ease

There are some fruitful methods you should give a try each one accordingly to annihilate Outlook Server Connection Error. After applying these methods, you can surely reconnect Outlook to the server and can frequently access Outlook account to send/receive mails or messages. Let’s begin the process!

Procedure 1: Disable Offline Mode

Couple of times, many users love to work on MS Outlook in the offline mode. Therefore, if you are using Outlook in Offline Mode, then it is highly recommended to first disable it and then try to connect Outlook to the server. Here are the ways to do so:
  • First of all, you have to launch “MS Outlook” on your Windows
  • Then, navigate to the “Send/Receive” section
  • Afterward, on the top right corner tap on “Work Offline” button to disable it
Once you perform these steps, you can start using MS Outlook in Online mode. I think you can now connect it with the server. If this trick fails, then try another method.

Procedure 2: Create Data File

There are basically two different files of MS Outlook, i.e., OST and PST files. Therefore, any glitches arise in these files might lead you to a connectivity problem. Try to re-connect by creating the data file with the help of below-noted instructions:
  • First, you have to close MS Outlook Application
  • Now, Go to “Start” menu and click on “Control Panel” option
  • After that, tap on “Mail” icon
  • In the next window, you have to click on the “Data Files” button
  • And then search for the file with the same email address
  • And give a click on “Open File” option
  • If your data file is an OST file, then rename the extension to “.OLD” and if it is PST, then leave as it is
  • At the end, close all the window and reopen MS Outlook
MS Outlook will start recreating the files and the time depends on the number of files on which the work is done. Once the process gets done a confirmation message “All Folders Are Up to Date” will be displayed on the screen and hence you can see “Connected To Microsoft Exchange” message. Finally, your Outlook Server Connection Error has been resolved.
Note: Don’t close MS Outlook in the middle of the process otherwise you might lose your data.
But what if you don’t have an OST file? In that case, you just have to use the Inbox Repair Tool. Here are the steps for this:
  • First, open C Drive and then click on Program Files (X86)
  • In the search box type “scanpst.exe” and press “Enter”
  • Once you find the tool tap on it and Run it
  • Browse the OST or PST file from the saved location
  • Click on the “Start” button to start the process
Once you complete these steps, the file with the errors will be popped-up on the display screen where you just have to repair those file and then after try to connect to the server. If yet the same error persists, proceed further guide.

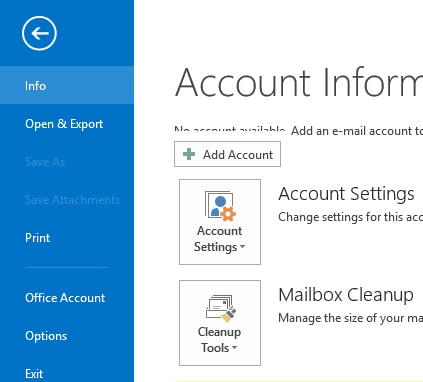
Procedure 3: Check Exchange Server Connection

What you require to do in this procedure is to turn-on logging on in the MS Outlook. The steps are mentioned below, so follow them stepwise:
  • Open MS Outlook on your PC
  • Go to the “File” tab and Click on “Options”
  • Choose the “Advanced” tab
  • Check the “Enable Troubleshooting Logging” option
  • Click on “OK” Button to Confirm
  • Restart MS Outlook Application
I hope MS Outlook will now be connected to the server. But, if yet fails, then try the last method.
Procedure 4: Repair MS Office Install
Go through the underneath points to do it:
  • First click on “Start” menu and then open “Control Panel”
  • Go to “Programs and Features” section
  • Find the “Microsoft Installation” program
  • Once you search it, give a right-click on it and then Select “Change”
  • In the next Window, Choose “Repair” and Click “Continue”
  • Once the procedures complete, restart your computer
Finally, you might be able to connect MS Outlook to Exchange Server and fix Outlook Server Connection Error.

Contact To Deft Connoisseurs If Yet MS Outlook Fails To Connect To The Server

Don’t be worried about the Outlook Server Connection Error if it is still unsolved even after performing appropriately the aforementioned guidelines. We have a team of highly expert and well-talented technicians ready to cater all your needs in one-stop. So, give an instant call at helpline number to be in touch with them at the comfort from your home. Efficacious solution will be proffered in a second.

Wednesday 6 May 2020

Way to fix Gmail Login Problems

In this growing edge of technical world, every single person is using Gmail account to fulfill their desired requirements in a simpler manner. But what if someone is facing Gmail Login Problems when trying to sign-in their account? Well, there are several possible causes behind occurrence of such a login problem. It could be due to server down problem, entering incorrect password, forget username, slow speed of internet and many more. Therefore, just be relaxed! We have compiled various fixing ways to sort out such a problematic hurdle. So, if you are unable to sing-in to your Gmail account despite being worried, keep your eyes feast on the blog-post.
gmail login problmes

Different Ways To Fix Gmail Login Problems

Many Gmail users have complaint that they are experiencing Gmail Login Problems and also raised a voice of assistance to efficiently cope-up this glitch from the root. So, today I have decided to give you effective information about what causes this error and its quick troubleshooting guides. Let’s have a glance on the underneath points and try to follow them:

Cause 1: Gmail Server Down Causing Gmail Login Problems

If your Gmail server is down, doesn’t matter how many times you are trying to sing-in to your Gmail account, it won’t be logged in, guaranteed. That’s why, it is highly recommended you all whoever having login error, check the server status in your specific location and also check whether Google is down in your area. If there is no server error problem, then it might be having a problem with Gmail itself. Try to deal with it or else you get failed by your own contact to expert IT technicians. But if it occurs due to server down, you need to wait until the server is up. After waiting, you can automatically access your Gmail account without confronting login error.

Cause 2: Incorrect Username And Password

The most common reason behind arising of Gmail Login Problems is due to incorrect username and password. Therefore, make sure while entering the user ID and Password that you have out them correctly. If you are not sure or don’t remember the actual password, try to reset your Gmail account password. But before you start recovery your lost password, you must need at least one recovery option for the verification to reset the password. 

Cause 3: Virus And Malware Attack

Attacking of virus and spyware on operating system can be the one possible reason for Gmail email Login Problems. You might unable to understand why it is happening as if your PC already has an antivirus program installed to eliminate viruses. The chances could be your antivirus program gets outdated or corrupted and is probably not working in our system.
Virus threats often hinder the creation of a Gmail account. Therefore, you need to uninstall your antivirus program first and then install it again properly. You may also replace the old version of the antivirus with a new one by upgrading it.
Although, many users complain that they can’t receive or send emails from their Gmail account. Gmail has a limit of storing emails. Once it crosses the limit, you won’t receive new emails. Therefore, what you should actually do is to delete all the unwanted messages from your inbox and clear the cache and the cookies to prevent Gmail Login error.

Cause 4: Browser Problem

After entering the correct user ID and Password and tap on “Sign-in” button, unfortunately the page cannot be displayed. This problem often occurs due to browser error. A full of junk files can be stored in your browser, so it is suggested to optimize your browser properly. If you don’t know how to optimize your browser, here are the ways to do so, follow them:
  • Delete the temp files of your browser
  • Clear the browser cache
  • Update your web browser
If the problem still persists, I would suggest you to reset your web browser. But before you start resetting the browser, you must have a backup of the bookmarks, saved passwords and useful information.

Cause 5: Internet Connectivity Issue

Gmail login page is not loading due to problems with the proxy server and security settings. In that situation, disable the proxy settings, antivirus and also the firewall. After disabling, login to your Gmail account to check the error has solved or still appearing.

Cause 6: Check Incoming Server Settings

There are several candidates who prefer to sign in via email client software despite using the browser. The Gmail Login Problem occurs due to incorrect incoming and outgoing server address. I will recommend you to check the server address and authentication mode.

Dial 24/7 Helpline Number For Instant Quality Support

I hope these above techniques help you to eradicate Gmail Login Problems. In case, you are having any confusion regarding these provided guidelines, you can contact to our skilled and talented technicians. They are available round the clock on helpline number, so place a call on that number anytime and stay tuned with top-most techies without any fear. They are friendly in behaviour, so you can ask for help without hesitation and they will calmly assist you.
Source: Email support

Thursday 30 April 2020

Ways To Fix Outlook Email Login Problems

Outlook email login problems are the common issues that may hamper your work while you’re using it. Hence, these errors can also be rectified easily by following simple steps. The outlook is a Microsoft product, that is a very popular worldwide for emailing and professional use. If you are also the Outlook user then this blog is very useful for you. Since, sometimes while using the Outlook app, you may face some fail, due to error. These failures include various Outlook email login problems such as- Outlook won’t open, outlook not connecting, outlook not receiving emails, email not working and so on.
outlook login problems
Hence, in this blog, you will get the solutions for some common Outlook email login issues. Let’s get started:

Learn The Solutions For Outlook Email Login Problems

Below we have mentioned some Outlook email login problems that you may face. Hence, keep on reading and learn the solution of- how to solve Outlook sign-in problems.

Outlook Won’t Open

This is the most common outlook login account issue, that users face at least once. Outlook won’t open issue is the startup issue with the navigation pane can prevent Outlook from opening correctly. By resetting the navigate pane might resolve this issue. Therefore, you have to press the Windows key + R key on the keyboard together. By this, a Run command box will get open. There you have type Outlook.exe/resetnavpane in the Open box and then click OK.
Why this error occurs in Outlook? This error may come in outlook due to:
  • Add-ins in the browser extensions.
  • Due to some virus attack
  • Maybe Outlook files got corrupted.
  • Network connection error.
Hence, considering navigation pane as the main culprit can be a mistake. Therefore, you should check all the mentioned causes and then try to open or use the Outlook. Now let us look for the solutions:
  1. To solve the Outlook won’t load issue, you should try running the Outlook in the safe mode. If the Outlook starts in the safe mode then there is likely to be the problems with the Add-ins that you have added in your browser.
  2. Second, disable the add-ins or any other third-party extensions you have. This will make your browser work easily and then you will be able to open the Outlook in the normal mode.
  3. Check whether the error is occurring due to the anti-virus program. If so, then disable the anti-virus software temporarily.
Through this, your Outlook is not the opening issue that can get solved. Now, enjoy your Outlook seamless services.

Why I Can not Sign In To My Outlook Account?

Well, this is the most common that generally come in front of the new users. If you are new and unable to sign in, don’t worry this section will solve your issue. When you are unable to sign in to your Microsoft Outlook account, then quickly try below mentioned basic troubleshooting steps:
  • Verify that Caps Lock is turned off and you entering your password correctly.
  • Clear the browser history.
  • Try to sign in using correct credentials from a different browser.
  • Restart your computer and log in to the Outlook account.
When you can’t remember your password, Outlook sign fail issue occurs. Therefore follow the below steps to reset your password.
  1. Go to Recover your account page.
  2. Now enter your email address, phone number or Skype ID you used when created the Microsoft Account. This could be any email address ending with any prefix such as- hotmail.com, gmail.com, outlook.com and others.
  3. If you have set the security info in your account then you will get an OTP (one-time-password) on your alternate phone number or email address. Use that code and enter it on screen and then you will be able to make a new password.
  4. Now enter your new password and click Next.
Your new Outlook password is ready, hence you can log in to your Microsoft Outlook account easily.
My Outlook Not Receiving Emails
When your Outlook stops its auto-sync, you become unable to receive any email. Hence, this issue can be solved with the few changes in Outlook Settings. Here you will also get to know- how you can activate getting Outlook emails automatically.
Solution:
Make sure that your account settings are correct, compare the settings in the Mail app with the settings of your email account.
  • Open Outlook.
  • Go to Settings >> Password and Accounts.
  • Tap on your email account.
  • Now select an email address next to Account to see the account information.
  • Check the settings of outgoing and incoming servers.

To enable your Outlook to receive emails automatically, follow the below-mentioned steps.

  1. In Outlook click on File and then select Options.
  2. Click the Advanced tab.
  3. In the Find Send and Receive section, select the Send/Receive option.
  4. Under the Group Name, choose group and then click Copy.
  5. Next under the Send/Receive group name, type the new group name and then click OK.
Through this, your Outlook mail will again start getting the emails automatically and you won’t need to face these Outlook email login problems.

Conclusion:

In the event when you experience issues in accessing your account by utilizing the login details and you face email sign in issues, then you should promptly ask for expert help. They will assist you in finding out the reason behind the issue. Just when genuine reason is known, they will use the methods to solve the error and will make you able to login appropriately. Hence, you will be capable to access your account. You have to contact the professionals and tell them about the error or the difficulty you are facing while logging in. Microsoft Outlook techniques are well aware of the problems and how to resolve the issue and bring things back on the track.
Source: Email support

Monday 20 April 2020

Easy Methods to Set up Bellsouth Email on Apple iPhone

Apple iPhone permits you to set up many email accounts on the apple phone for accessing to your Bellsouth emails from anywhere with the proper Wi-Fi connection, or an Internet connection. The Bellsouth emails are easily and quickly accessible via the apple phone’s mail application. The full, and proper set up of the Bellsouth account provides you the capability to send email messages from the apple iPhone. So, the set up process of Bellsouth email is very easy, hassle-free, and accurate procedure for the users. So, users must take care of Bellsouth email settings for creating Bellsouth email on apple iphone.

What you should do before setting up the process?

If you have created a Bellsouth email account, you need to add it to the apple Iphone account. If you don’t have ideas for Bellsouth email account setup, you can follow easy and right steps for completing the setup process. If you are new to set up email on an iphone device, you can follow the detailed procedure explained below to access the Bellsouth email account on your apple iphone. Apart from this, if you want to set up Comcast email on the apple Iphone, you can call online technical professionals to get full technical guidance. In addition, if you want to set up Comcast email on iphone, it is very important for you that you have full information on Comcast email settings. For any doubts, you can call trained technical professionals anytime.

The full and accurate setup process of Bellsouth email on Apple Iphone-

We are going to explain some important instructions to set up the Bellsouth email account on the apple Iphone. These steps are very helpful to set up the Bellsouth email account on the apple Iphone. For any technical doubts, you can call online technical experts to get quick support or specialized help.

Step1- For apple iphone, you need to launch the Bellsouth email settings app
Step2- Next, you need to hit on contacts, mail, and calendar option
Step3- You are needed to hit on add the account button
Step4- You should hit on other button and choose add account
Step5- Then, you should give the login credentials of the Bellsouth email account.
Step6- Apart from it, you must give the password of the account and give the full description of the Bellsouth account
Step7- In addition, for the Bellsouth email settings, you have to hit on the POP button and enter the hostname as inbound.att.net correctly
Step8- You should give the Bellsouth email address and password to verify the incoming server.
Step9- Then, you must click on the “save” button and scroll down to search the advanced button correctly.
Step10- Additionally, you need to set incoming and outgoing usages to SSL with 465, and 995.
Step 11- Finally, you can click on the “save” option to set up the Bellsouth email account on the Apple Iphone successfully. With the help of the proper Bellsouth email settings process, you can enjoy the emailing services with your account.

All these instructions are extremely helpful to set up a Bellsouth email account on Iphone. Apart from this, if you want to set up the Comcast emails on apple iphone, you should have knowledge of Comcast IMAP settings to set up the email. For any confusion, you can call online technical professionals to get full technical guidance or specialized assistance.

Wednesday 1 April 2020

How to Configure AOL Email Settings Using IMAP

If you want to download email, IMAP is meant to be the best option for any email client. Now in case any user wants to access AOL Mail and work with any compatible email client, IMAP is necessary. First, mention specific details about AOL Mail and then work upon the IMAP server settings. All your messages can be accessed with the AOL Mail IMAP server. Thus, you need to AOL Email settings to retrieve the notifications.

Why AOL prefer IMAP server settings?

AOL suggests using IMAP setting over POP3 and SMTP. Although both these protocols are supported by AOL. However, there are a few points that IMAP beats in terms of features.
Like: IMAP has the potential to sync the particular service with the AOL Mail account. Thus, whatever actions you perform on email service or app also shows in the AOL Mail interface at AOL. But, POP fails to do so. Instead POP makes a copy of the email.
AOL Email Settings

What are the AOL IMAP Settings?

At the time when you set AOL email providers to various other email providers,  you will enter specific details. This allows other providers to use your AOL Mail. Below are some IMAP Settings to receive AOL Mail:
  • AOL Mail IMAP server address: imap.aol.com
  • AOL Mail IMAP username: AOL Mail email address
  • AOL Mail IMAP password: AOL Mail password
  • AOL Mail IMAP port: 993
  • AOL Mail IMAP TLS/SSL required: Yes

Which features are unavailable on other Mail Applications?

Below this article includes what other apps fail to have the feature over AOL email settings:
  • Message status: Unable to access unread messages and the user cannot see the status of sent messages. AOL mail allows that.
  • Spam: Users do not get permission to use the Report button. Whereas, AOL Mails gives access to report spam any messages that are harmful.
  • Delete Mail: Different email applications have different settings. Some allow seeing the deleted emails and some do not show the deleted emails.
Note: In some mobile app when you try to set up AOL Mail, there is no need to enable IMAP settings. For example: If we talk about the iPhone Mail app, you simply need to open iPhone’s setting>Accounts section>select AOL icon. This phone is preconfigured with IMAP settings. You only need to mention the username and password.

AOL SMTP Settings

If you want to send a new email from your AOL Account, fill the SMTP settings details during the account setup to send the outgoing emails from your AOL Mail account. Below given are the details you need to fill in the required space:
  • SMTP Outgoing server address: smtp.aol.com
  • SMTP port: 465
  • SMTP security: TLS/SSL
  • SMTP username: AOL email address
  • SMTP password: AOL password

Technical Helpdesk
Did you follow the above-given steps for AOL Email IMAP Settings? If in case you could not receive the final result then there must be some technical issue. However, it’s not any giant issue that cannot be resolved. To rectify the issue, get in touch will the technical expert team and acknowledge them about the persisting problem. They are highly-skilled and will not take much time to share the solution. Availability is 24*7. Thus, you can connect with the group anytime.
Originally published on emailsupport.us

Tuesday 31 March 2020

How To Configure Bellsouth Email Settings For Outlook?

In the United States Bellsouth email service is quite famous. As States has a large number of customers of Bellsouth, therefore they also get into so many troubles related to it. Hence Bellsouth email settings require a bit of expert advice if you are not aware of it. When you decide to you this email service provider you have to do setup first.
Bellsouth Email Settings
Are you unaware of the Bellsouth email setup process? Don’t you know how to proceed with is you face any technical issues in it? Well, don’t worry here in this blog you will get all the solutions. The issues generally users face are either related to sing-up or send/receive an error. So, if you are facing any one of errors or some other issues then take the complete tour of the blog to get complete knowledge about it.
As so many users also use Outlook as their go-to email client, hence there you will also find the email settings about how to configure Bellsouth.net account on Outlook.

Bellsouth Email Settings For Outlook

Setting up the Hotmail account in Outlook.com is as simple as it sounds. While doing this you don’t need to do any manual configuration of incoming and outgoing servers. Just enter the credentials and sink emails and you are done.
But it is not the same case with third-party email clients. As some of them need manually approach when configuring POP3 SMPT servers. If you have knowledge about the procedure then obviously it will e easy for you. However, if not then don’t worry you can easily set up the Bellsouth email by following our guide. Below is the guide to setup Bellsouth email in Outlook on Windows 10.
  • Open the Outlook client
  • Select File and click on Add Account
  • Now select “Manual configuration server setting or additional server types”
  • Click Next >> Yes on the new window
  • Next, you need to enter the Bellsouth email address and name
  • Select IMAP and POP and click on Next
  • In Incoming Mail Server: ‘imap.mail.att.net’In Outgoing Mail Server: ‘smtp.mail.att.net’
  • When prompted enter your email address and password
  • Click on More Settings and check both “My outgoing server (SMTP) requires authentication” and “Use same settings as my incoming mail server” boxes.
  • Now click on Advanced tab and make sure that incoming Server port number for POP3 is 995
  • And ensure that Outgoing Server Port has- 465
  • Now, under SSL disable- Use the following type of encrypted connection.
  • Click Finish, the email setup process is completed now
Now you can enjoy your Bellsouth and Outlook mail in one place. If Outlook is your go-to email service provider don’t worry you won’t miss your Bellsouth email mails, because now you can access them on Outlook as well.

Troubleshoot Issues:

While setting Bellsouth email, configuring with Outlook, or signing up if you face any error, you can consult with Bellsouth email expert for instant solutions. If you are facing the send and receive an error, you should look for all kinds of configurations that you have done recently. And still, find yourself unable in solving the issue, consult the Bellsouth skilled technicians to get the best solutions of the error.
By performing the above Bellsouth email settings you will be able to send and receive emails without facing any issue. Outlook will allow you all kinds of configuration options and settings, therefore ensure that you customize it according to your needs.
Originally published on emailsupport.us

How To Configure Outlook IMAP Settings With Outlook.com account

If you are looking for the Outlook IMAP settings, then you have landed on the right page. As there is no point for roaming here and there just get complete information on one thing. But here you will get complete guidance on the Outlook IMAP setup process with the Outlook.com account. As outlook is a popular email service provider all around the world, because of its advanced features. It also allows users to manage there all things in one place. After setting up IMAP you can access over Outlook.com account even if you use it on browser or app.
Outlook IMAP Settings
You will get complete guidance on- how to configure outlook IMAP with outlook.com account. It includes a few steps and changes in Outlook settings that you need to save to apply the changes. Is it sounding a little daunting? Don’t worry below we have explained all the information step-by-step below.

Configure Outlook IMAP Settings

To add your account to Outlook, Outlook on the web, Outlook.com or the Mail and Calendar apps for Windows 10, you need several pieces of information. The information includes account type, the incoming and outgoing server names, and the port and SSL settings.
And if you using a similar email service such as- Outlook.com, use the below-given table:
ProtocolServerPortEncryption
IMAPimap-mail.outlook.com993TLS
SMTPsmtp-mail.outlook.com587STARTTLS
POPpop-mail.outlook.com995TLS

Follow The Step-by-Step Guide Instructions:

  • Open your Outlook and click on File Tab on the upper left corner of the Outlook Window.
outlook imap settings
  • Now Click on Add Account
outlook imap settings
  • Next, you need to select Manual setup or additional server types.
  • Click Next to proceed further.
  • In the Add Account window, under the Choose Service page, you need to choose one option among three.
  • Tick on Pop or IMAP. Click Next in the next window you will be asked to enter a few details:
  • Here you have to type your name and email address.
    • In Account Type drop-down – select IMAP.
    • Set Incoming mail server to imap-mail.outlook.com
    • Set Outgoing mail server (SMTP)to smtp-mail.outlook.com
  • Fill your Login information: User Name and Password
  • After filling all the detail you need to click on More Settings.
outlook imap settings
  • In the new window tap on Outgoing Server
  • Tick on My outgoing server (SMTP) requires authentication
  • After completing this, you need to tap on Advanced setting option
outlook imap settings
  • Under Server Port Number you need to fill information carefully:
    • In ‘Set Incoming server (IMAP)’ enter- 993.
    • In ‘Use the following type of encrypted connection’ enter – SSL.
    • In ‘Set Outgoing server (SMTP)’ enter- 587.
    • In ‘Use the following type of encrypted connection’ enter- TLS.
outlook imap settings
  • Scroll down and click OK
  • Click Next and then Add Account window to test the settings.
  • Now Click Save to secure your changes.

Outlook.com IMAP Connection Errors:

While doing Outlook settings using IMAP, you may encounter an error if you configured your outlook.com account as IMAP in multiple email clients. Hence, to fix the connection in Outlook.com during the process you can try resolving with the help of the below steps.
  • Navigate to account.live.com/activity and sign in using the email address and password of the account that is affected.
  • In the Recent Activity tap, you need to locate for the Session Type event. This is a need because it will show you the exact time when you received the connection error. Click on it to expand.
  • Tick on ‘This was me’ to let the system clear authorize issues.
  • Attempt to connect to the account via your IMAP client.
If you want to get more information about- how to use the Recent Activity page, then you can go by- what is the recent activity page?

Conclusion:

Hence, the guide above will make you able to connect configure your Outlook setting using IMAP to access Outlook.com. However you find any issue while doing such, you can take expert help to solve it immediately. While configuring if you face any error other than connection issues, you can take expert help to rectify it.
Originally published on emailsupport.us